
These Valentine’s Day Cookies are the perfect blend of sweetness and charm, designed to make your celebration unforgettable. With a buttery, melt-in-your-mouth texture and a hint of vanilla, each bite is a delightful treat. The soft, tender cookies are ideal for decorating, allowing you to unleash your creativity with vibrant icing and sprinkles. In just 2 hours of prep and 12 minutes of baking, you’ll have a batch of 20 heart-shaped delights ready to impress. Let the icing set for a few hours, and you’ll have cookies that are as beautiful as they are delicious.
These cookies are more than just a dessert—they’re a heartfelt gesture that speaks volumes. The smooth, creamy icing contrasts perfectly with the slightly crisp edges, creating a symphony of textures. Whether you’re sharing them with a loved one or gifting them to friends, these cookies are sure to spread joy. The total time of 6 hours ensures every detail is perfect, from the golden-brown bake to the intricate decorations. Celebrate love with a treat that’s as special as the occasion itself.
Ingredients for Valentine’s Day Cookies
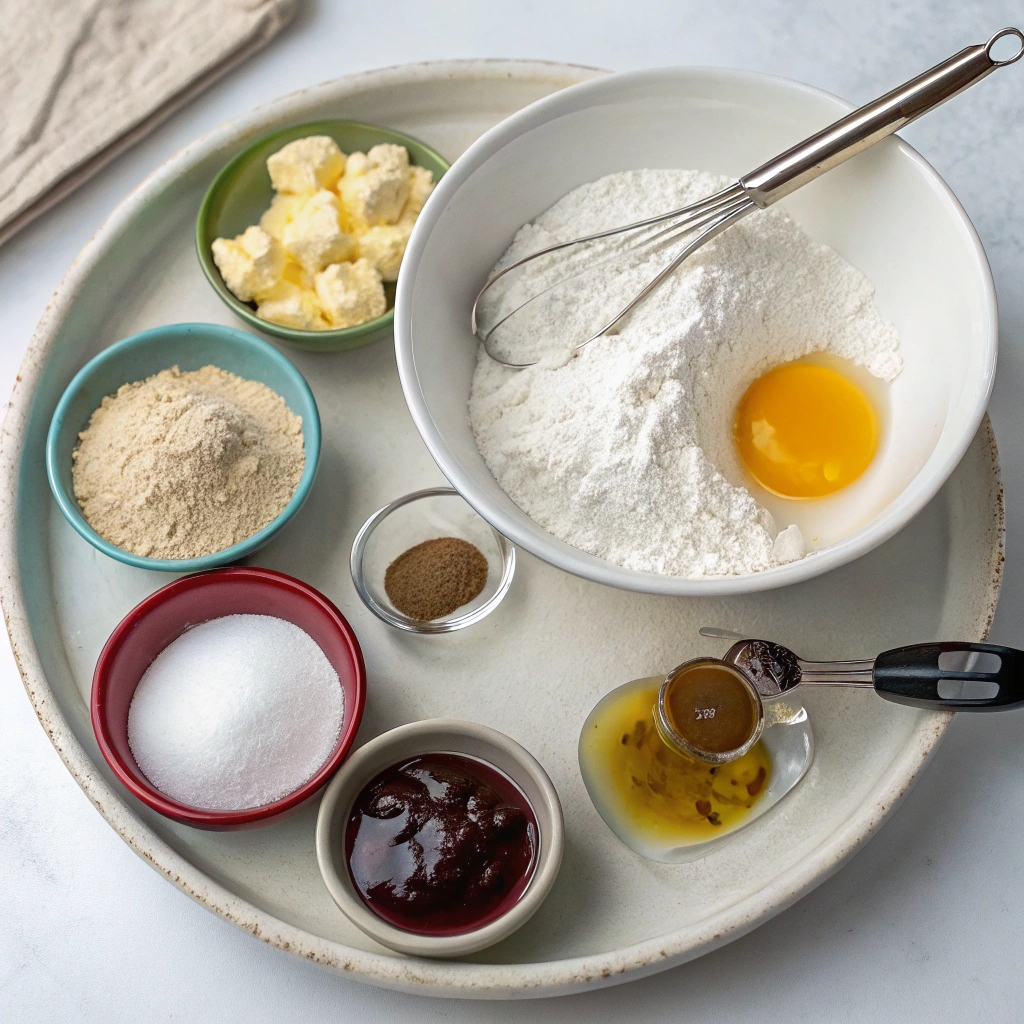
- 2 and 1/4 cups (281g) all-purpose flour (spooned & leveled, plus extra for rolling)
- 1/2 teaspoon baking powder
- 1/4 teaspoon salt
- 3/4 cup (12 Tbsp; 170g) unsalted butter (softened to room temperature)
- 3/4 cup (150g) granulated sugar
- 1 large egg (at room temperature)
- 2 teaspoons pure vanilla extract
- 1/4 or 1/2 teaspoon almond extract (optional, but adds amazing flavor)
For the Royal Icing:
- 4 cups (480g) confectioners’ sugar (sifted, Domino brand recommended)
- 3 Tablespoons meringue powder (not plain egg white powder)
- 9–10 Tablespoons room-temperature water (adjust as needed)
- Gel food coloring kit (or any gel food coloring)
Step-by-Step Instructions
- Prepare the dough: In a medium bowl, whisk together the flour, baking powder, and salt. Set aside.
- Cream butter and sugar: In a large bowl, beat the butter and sugar on high speed until smooth and creamy (about 2 minutes). Add the egg, vanilla, and almond extract (if using). Beat on high until combined (about 1 minute). Scrape down the sides of the bowl and mix again if needed.
- Combine wet and dry ingredients: Add the dry ingredients to the wet ingredients and mix on low until combined. If the dough is too soft, add 1 more Tablespoon of flour.
- Roll the dough: Divide the dough into 2 equal parts. Roll each portion to 1/4-inch thickness on a lightly floured surface. Stack the dough pieces with parchment paper in between, cover with plastic wrap, and refrigerate for at least 2 hours (or up to 2 days).
- Cut and bake: Preheat the oven to 350°F (177°C). Line baking sheets with parchment paper. Cut the chilled dough into hearts using a 3.5-inch cookie cutter. Re-roll scraps and repeat. Arrange cookies 3 inches apart on baking sheets. Bake for 11–12 minutes or until lightly browned around the edges. Cool on baking sheets for 5 minutes, then transfer to a wire rack to cool completely.
- Make the icing: In a large bowl, combine confectioners’ sugar, meringue powder, and 9 Tablespoons of water. Beat on high speed for 1.5–2 minutes until the icing drizzles smoothly. Adjust consistency with more water or sugar as needed.
- Color the icing: Separate the icing into 6 bowls. Add 1 tiny drop of pink, violet, green, yellow, and orange to each bowl. For the writing icing, add 2–3 drops of red. Cover the red icing with a damp paper towel to prevent hardening.
- Decorate the cookies: Spoon pastel icings into piping bags fitted with tip. Pipe borders and fill the cookies. Let the icing set for at least 2 hours. Use the red icing in a piping bag with tip to write messages on the cookies. Allow the writing to set for 2–3 hours.
- Store: Keep decorated or plain cookies covered at room temperature for up to 5 days or in the refrigerator for up to 10 days.
Creative Decorating Ideas for Valentine’s Day Cookies
Take your cookies to the next level with fun and festive decorations! Use heart-shaped sprinkles, edible glitter, or even mini chocolate chips for added texture. For a romantic touch, pipe “XOXO”, “Be Mine”, or “Love You” messages with the red icing. You can also create ombre effects by blending different shades of pink icing for a stunning look.
Time-Saving Tips for Busy Bakers
Short on time? Prepare the dough up to 2 days in advance and store it in the fridge until you’re ready to bake. To speed up the chilling process, roll the dough into a log and freeze it for 30 minutes instead of refrigerating for 2 hours. For quicker decorating, skip the intricate piping and dip the cookies directly into the icing for a smooth, glossy finish.
Storage and Freshness Tips
Store your decorated cookies in an airtight container at room temperature for up to 5 days or in the fridge for up to 10 days. To prevent the icing from smudging, place parchment paper between layers of cookies. If you’re making these ahead of time, freeze the undecorated baked cookies for up to 3 months and decorate them just before serving.
Recipe Variations to Mix It Up
Experiment with different flavors by swapping the almond extract for lemon or orange extract for a citrusy twist. For chocolate lovers, replace 1/4 cup of flour with cocoa powder to create chocolate heart cookies. You can also use different cookie cutter shapes like stars or flowers to suit any occasion.
Essential Equipment for Perfect Cookies
To make this recipe a breeze, ensure you have a stand mixer or handheld mixer for creaming the butter and sugar. A silicone baking mat or parchment paper is a must for easy cleanup, and a 3.5-inch heart cookie cutter will give you the perfect Valentine’s Day shape. For decorating, invest in a set of piping bags and tips for precise icing work.

Valentine’s Day Cookies Recipe
Ingredients
Cookie Dough
- 2 and 1/4 cups all-purpose flour (spooned & leveled) plus more as needed for rolling and work surface
- 1/2 teaspoon baking powder
- 1/4 teaspoon salt
- 3/4 cup unsalted butter softened to room temperature
- 3/4 cup granulated sugar
- 1 large egg at room temperature
- 2 teaspoons pure vanilla extract
- 1/4 or 1/2 teaspoon almond extract optional, but makes the flavor outstanding
Royal Icing
- 4 cups confectioners’ sugar sifted (I use and recommend Domino brand)
- 3 Tablespoons meringue powder not plain egg white powder
- 9–10 Tablespoons room-temperature water
- gel food coloring kit for tinting or any gel food coloring
Instructions
- Whisk the flour, baking powder, and salt together in a medium bowl. Set aside.
- In a large bowl using a handheld or a stand mixer fitted with a paddle attachment, beat the butter and sugar together on high speed until completely smooth and creamy, about 2 minutes. Add the egg, vanilla, and almond extract (if using) and beat on high speed until combined, about 1 minute. Scrape down the sides and up the bottom of the bowl and beat again as needed to combine.
- Add the dry ingredients to the wet ingredients and mix on low until combined. Dough will be a bit soft. If the dough seems too soft and sticky for rolling, add 1 more Tablespoon of flour.
- Divide the dough into 2 equal parts. Place each portion onto a piece of lightly floured parchment paper or a lightly floured silicone baking mat. With a lightly floured rolling pin, roll the dough out to about 1/4-inch thickness. Use more flour if the dough seems too sticky. The rolled-out dough can be any shape, as long as it is evenly 1/4-inch thick.
- Lightly dust one of the rolled-out doughs with flour. Place a piece of parchment on top. (This prevents sticking.) Place the 2nd rolled-out dough on top. Cover with plastic wrap or aluminum foil, then refrigerate for at least 2 hours and up to 2 days.
- Once chilled, preheat oven to 350°F (177°C). Line 2–3 large baking sheets with silicone baking mats or parchment paper. Carefully remove the top dough piece from the refrigerator. If it’s sticking to the bottom, run your hand under it to help remove it. Using a heart cookie cutter (pictured cookies use the 3.5-inch size), cut the dough into hearts. Re-roll the remaining dough and continue cutting until all is used. Repeat with 2nd piece of dough. (Note: It may not seem like a lot of dough, but you get a lot of cookies from the dough scraps you re-roll.)
- Arrange cookies on baking sheets 3 inches apart. Bake for 11–12 minutes or until lightly browned around the edges. If your oven has hot spots, rotate the baking sheets halfway through bake time. Allow cookies to cool on the baking sheets for 5 minutes, then transfer to a wire rack to cool completely before decorating.
- Make the icing: I have a video for how to make royal icing below. Use that as your guide for this step. Combine sifted confectioners’ sugar, meringue powder, and 9 Tablespoons of water in a large bowl. Using a hand mixer or a stand mixer fitted with a whisk attachment, beat icing ingredients together on high speed for 1.5–2 minutes. When lifting the whisk up off the icing, the icing should drizzle down and smooth out within 5–10 seconds. If it’s too thick, beat in more water 1 Tablespoon at a time. I usually need 10 Tablespoons, but on particularly dry days, I may use up to 12–14 Tablespoons. Keep in mind that the longer you beat the royal icing, the thicker it becomes. If your royal icing is too thin, just keep beating it to introduce more air OR you can add more sifted confectioners’ sugar. Yields about 3 cups of icing.
- Separate icing into 6 different bowls. (Or fewer bowls, depending how many colors you want.) Stir in 1 tiny drop of the following colors into each bowl, 1 color per bowl: pink, violet, green, yellow, and orange. The 6th bowl is for the writing. For that, stir in 2–3 drops of red. You won’t use the red icing for a couple hours after the base icing sets, so place a damp paper towel directly on the surface of it. This prevents it from hardening.
- Spoon or pour the pastel icings into piping bags (disposable or reusable) fitted with round piping tip #4. If you only have 1 tip and want to decorate with multiple colors of icing, keep the tip on the outside of the bag by using a coupler so you can easily transfer the piping tip to other bags of colored icing. Decorate cookies with colored icing by piping a border around the edges and then filling it. Let the icing-covered cookies mostly set, uncovered, for at least 2 hours before adding writing.
- Spoon or pour the red icing into a piping bag (disposable or reusable) fitted with round piping tip #2. Write desired words/messages on the cookies (ideas/suggestions listed in the post above!). Writing icing will set within 2–3 hours.
- Decorated or plain cookies stay fresh covered at room temperature for 5 days or in the refrigerator for up to 10 days.